I needed a good set of mirrors for my panel trucks and the F-4. I have a set of 4" round mirrors that clip to the door edge on my F-2 pickup and they're pretty much useless. They look good on the old truck but offer no good field of vision of what is behind or on the side of the truck. I wanted a better set for the panels and the F-4 because their blind spots are a lot greater than the pickup. I also wanted something that looked vintage, as maintainance free as possible at a reasonable price. Although I was kind of leaning toward the West Coast style of mirror I didn't want to drill holes in my doors and I was also concerned about what would happen if I caught the mirrors on something, I have see many trucks with extensive damage from this happening. Also, the West Coast mirrors that where what I thought were the correct size for my truck were all chromed plated, go for rusting in all of the seams. 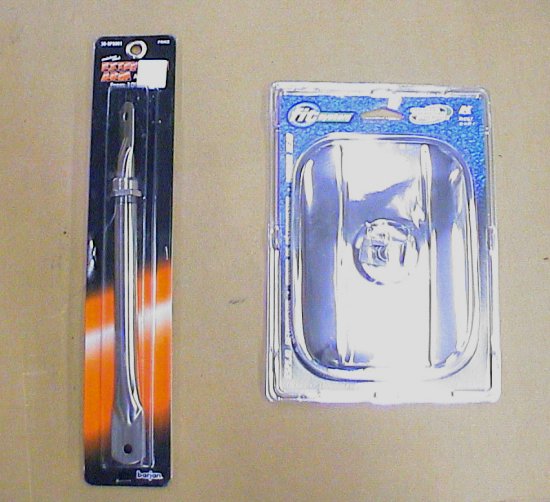 |
I only had one set of factory mirror brackets that were on an old rusty door and I wanted to have a mirror on both sides of the trucks so I decided to make my own reproduction mirror brackets. 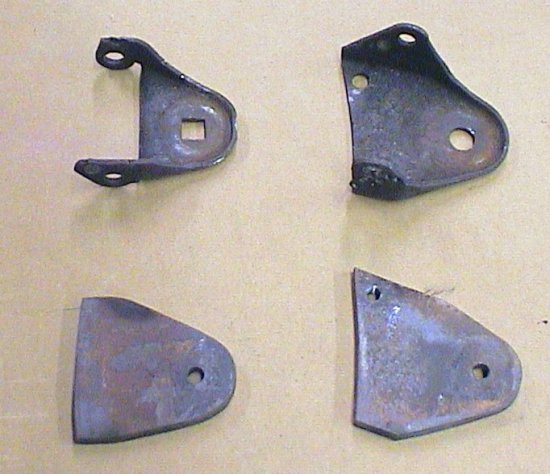 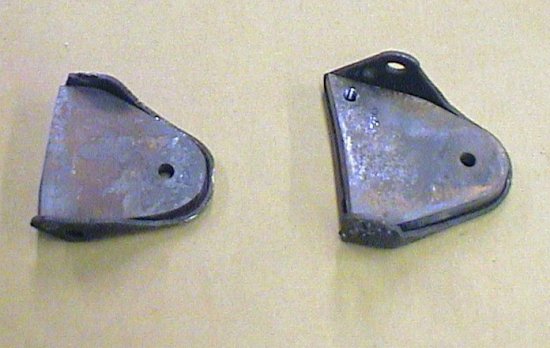 I then used an heavy piece of iron, in this case an old train rail and trimmed off the end to allow room so the outside edges of my forms hung out over the side and didn't interfer when I hammered the sheet metal over the form. 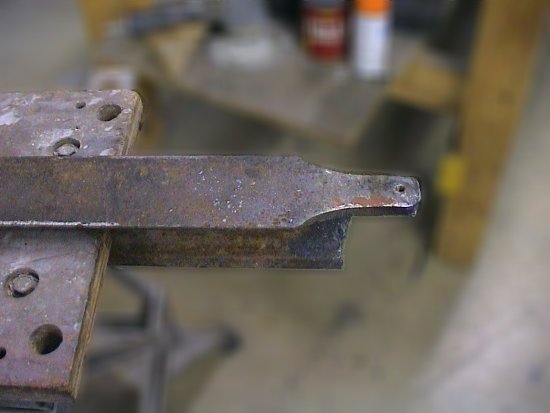 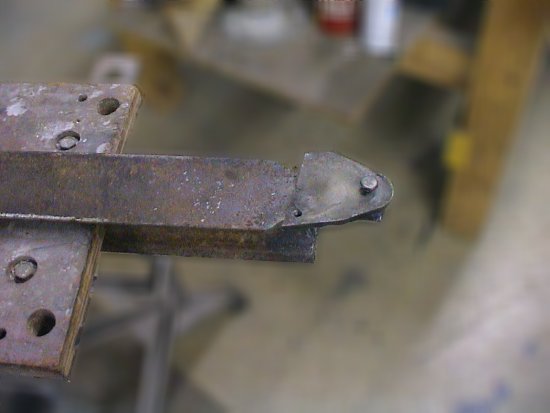 I again used the card stock to trace the outside of the old brackets to make a rough template of the shape of the piece of 14ga sheetmetal I needed to form over the 1/4" forms:  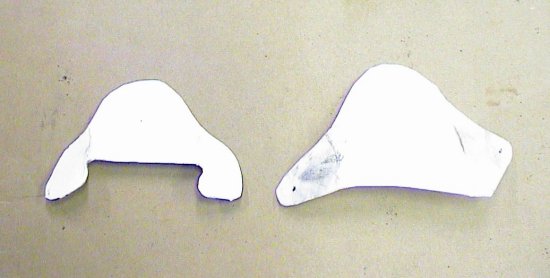 (Sorry, I don't have pictures of the following procedures. I will try to post some when I build another set of brackets)After making the card stock forms I traced them onto the 14ga steel, cut them out with a sabre saw and drilled the main pivot hole in the both pieces. I used the pivot holes to line up the sheet metal, form and the rail. 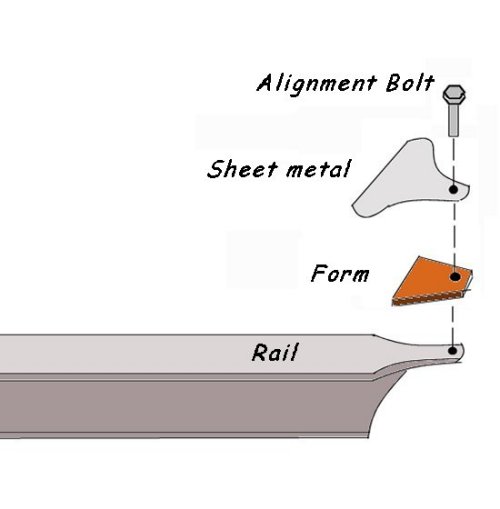 I used a torch to heat the metal red hot and a body hammer to form it over the form. I also used visegrip pliers to maintain a firm postiton of the sheet metal and the form. After I had the brackets formed over the 1/4" metal form I used a 4" angle grinder to achieve the final shape. I them measured the holes of the old brackets and transferred them to the new brackets. 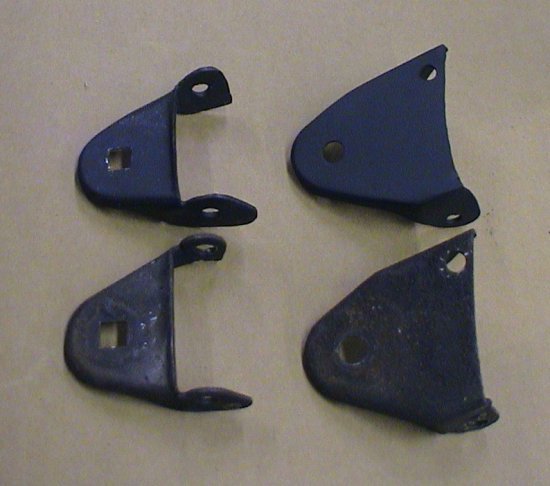 I bought stainless 3/8" carriage bolts, acorn nuts, lock washers and a bag of 3/8" flat washers to use to shim both sides of the bottom of the arm inside the bracket, the original used two spacers but I couldn't find a cheap stainless replacement. The whole project cost less than $30 a mirror with bracket. Here is how the whole setup looks next to the original mirror: 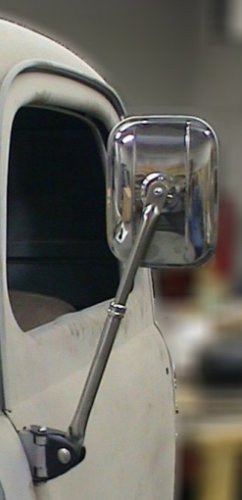 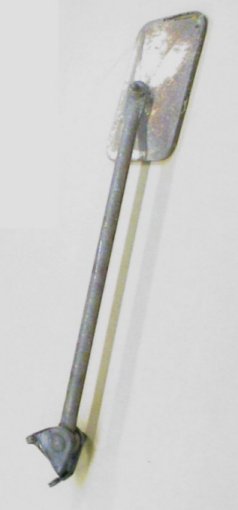 This is how I currently have the mirror assembled: 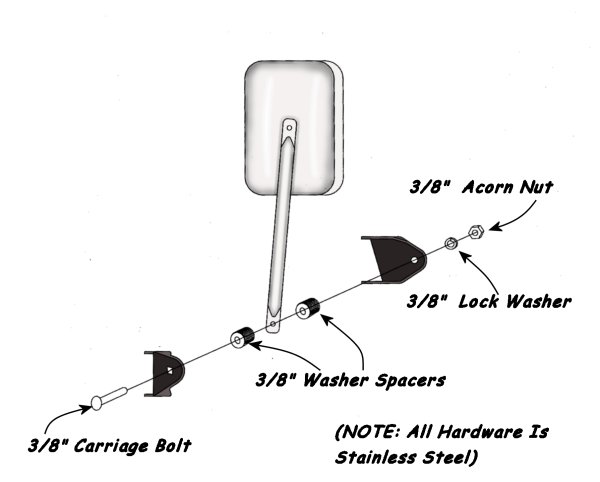 On further examination I think I am going to modify this set up. I see too much potential for slippage between the flat washers I am using as spacers allowing the mirror to fall. The original mirror set up used two tube type spacers: 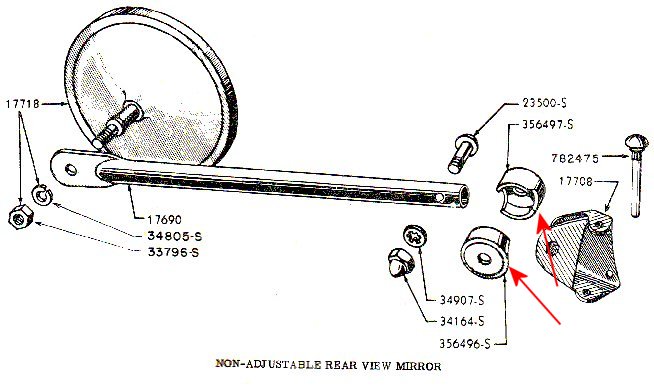 |
Last updated on April 4, 2007 |
|||