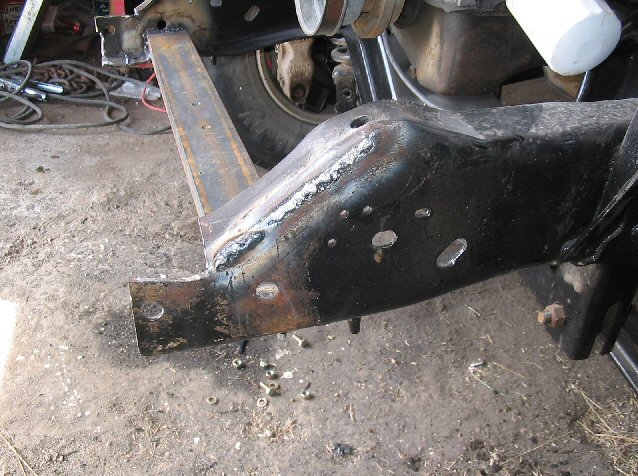
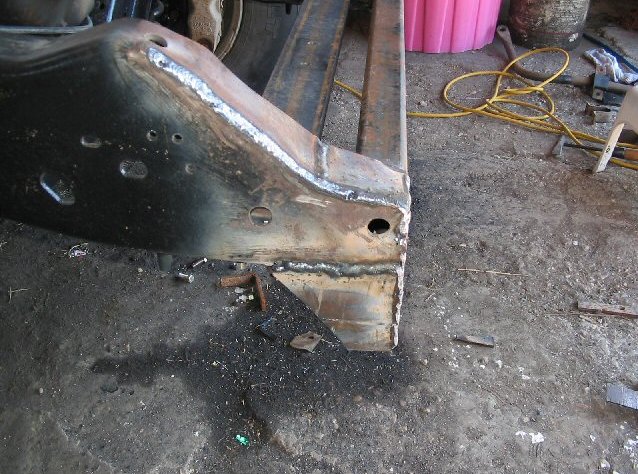
| The top of the frame rail will need some "persuasion" to make
it fit flush. Notice that I have cut out the portion that had the big hole as
that is too big of a hole to fill.
|
|
|
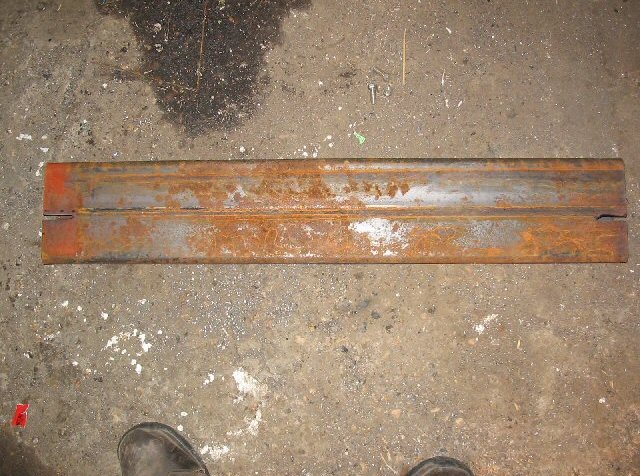
| Cut a piece of the 2 x 6 x 3/16 rectangular tubing so it will
fit flush inside the frame rails. You will have to notch ONE side of the
rectangular tubing 3 1/4" from the bottom. Now fit it onto the front of the
Supercab frame.
|
|
|
| Make sure it is sitting level in the frame before you weld it
in or it will cause alignments problems later.
|
|
|
| I welded a small piece to fill in the gap. Note: I did weld
the rectangular tubing on top before I welded the piece on.
|
|
|
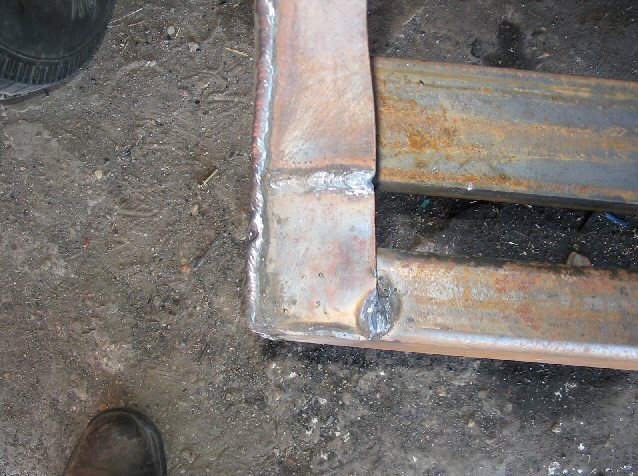
| I welded a triangular piece to help strengthen and close the
end of the rectangular tubing off.
|
|
|
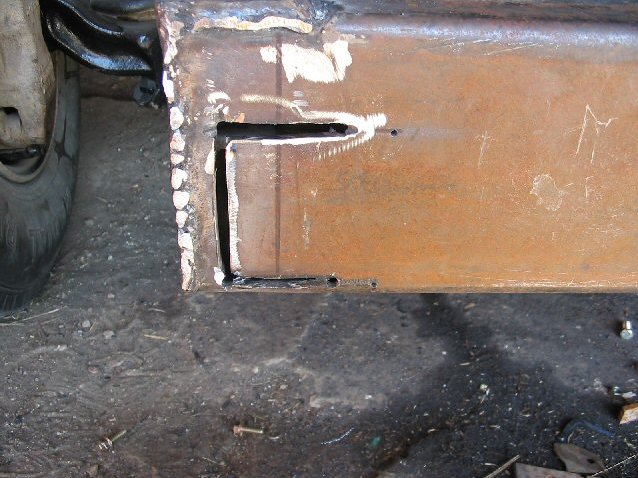
| Here you can see where I cut a slot for the front bumper mounts
to fit from the 48-52 frame. You want it to sit just above the bottom of the
rectangular tubing and 1" from the edge. Do the same for the other side. It
will be a lot stronger if the frame rail gets slid inside of the rectangular
tubing instead of just welding it flush with the side.
|
|
|
| You will need to cut the front bumper mounts from the 48-52
frame. Take a measurement from the center of the radiator mounting holes on the
Supercab frame to 1/4" from the back edge of the rectangular tubing. Now take
the measurement you got and mark it on the 48-52 frame, then cut them off.
Compare them side to side to make sure they are the same length. You will have
to make a small notch in the frame rail so it slides over the bottom of the
Supercab frame.
|
|
|
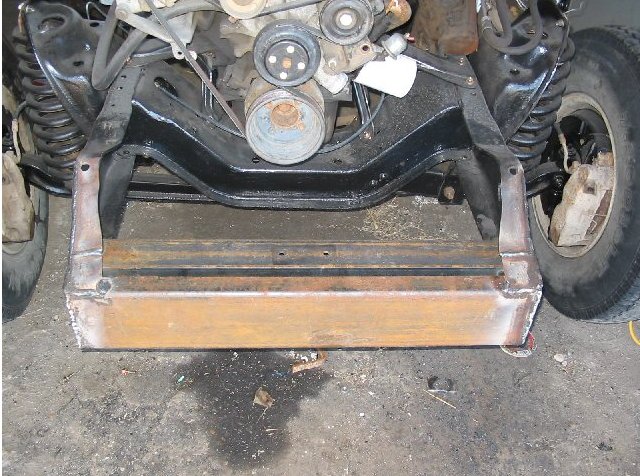
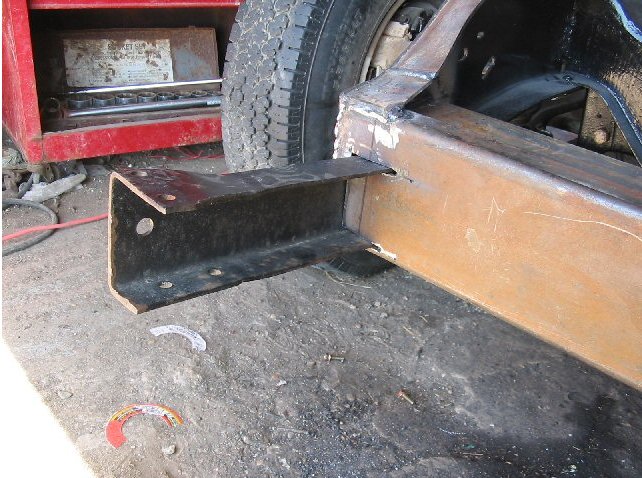
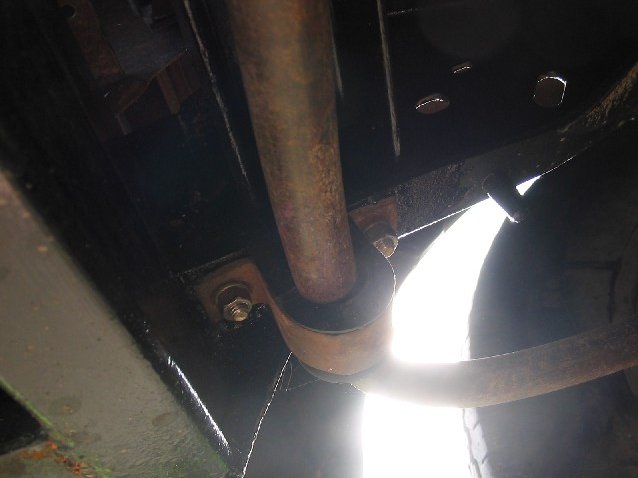
| Make sure they are fully inside of the rectangular tubing and
are sitting level or else your bumper will be crooked. Before you start welding,
bolt the front bumper on. Note: for this picture I removed the bumper and pulled
the truck onto car ramps to help with welding the bottom. Here you can see
how the front sway bar mounts.
|
|
|
|
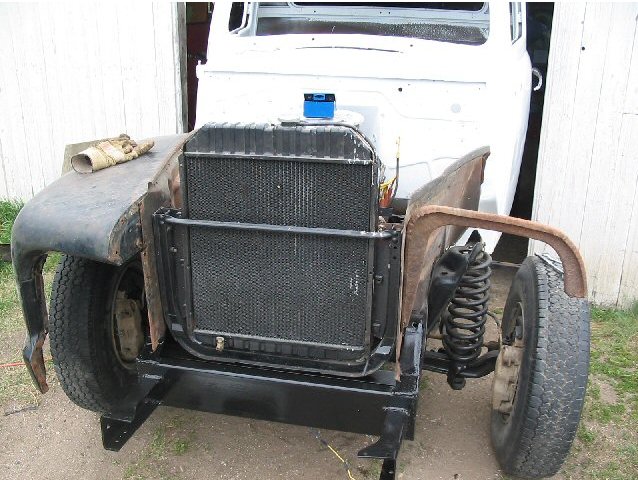
| You can start to assemble the front sheet metal. I had the
stock radiator totally rebuilt with proper outlets for the 302 and built in
tranny cooler. You can also buy an aftermarket radiator too.
|
|
|
| You will have to do some trimming of the inner fenders to make
them fit. Also you should make a new bottom right mounting bracket because the
stock one had to be cut off to make the inner fenders to fit.
|
|
|
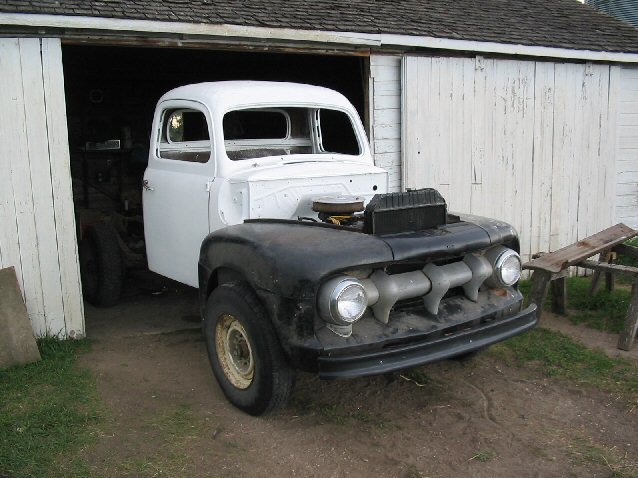
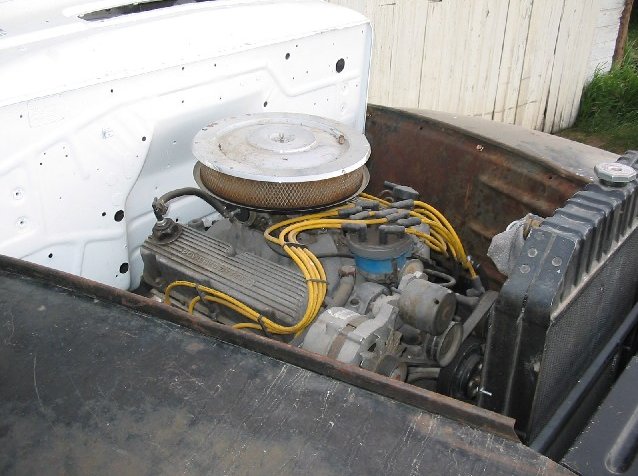
| This is what your truck should look approximately with the
front sheet metal on. I didn't put the hood on because I still have some stuff
to work on under the hood. As you can see the 302 fits the engine compartment nicely.
|
|
|
|
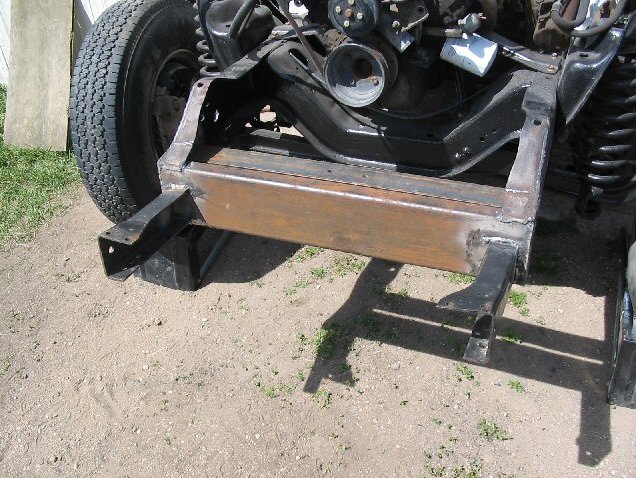
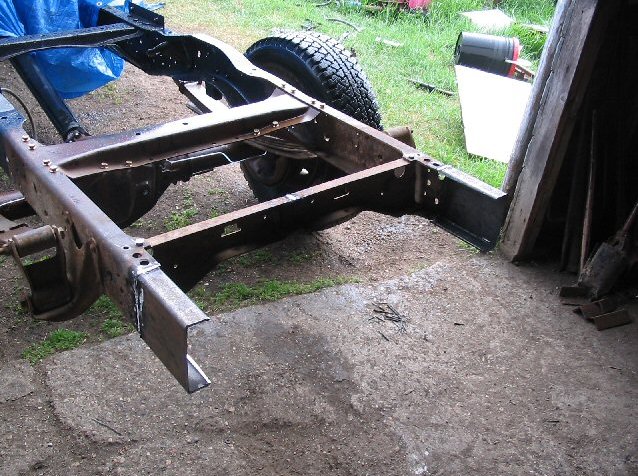
| Now we head to the rear of the frame. To make the pickup box
to fit, the frame has to be lengthened 7". Here is another piece of the 2" x 6"
rectangular tubing but with the side removed. I managed to fit it into the chop
saw and was able to cut 3/4 of the way through. Then I used the angle grinder
to cut the rest.
|
|
|
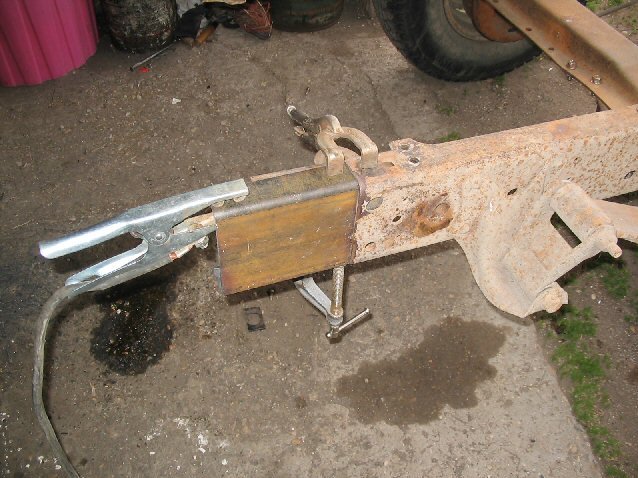
| I got the piece clamped into place and it is ready to be welded.
|
|
|
| I then welded it on. I didn't weld any reinforcements on the
inside of the frame because the only load it will be seeing is holding the rear
bumper. I gave it a good whack with a rubber mallet and it didn't flinch. You
might want to add reinforcements if you plan on adding a trailer hitch. If I
added a trailer hitch I would make the mounting brackets long enough to bolt
it through the original frame and not just on the 7" piece you just added.
|

|
|
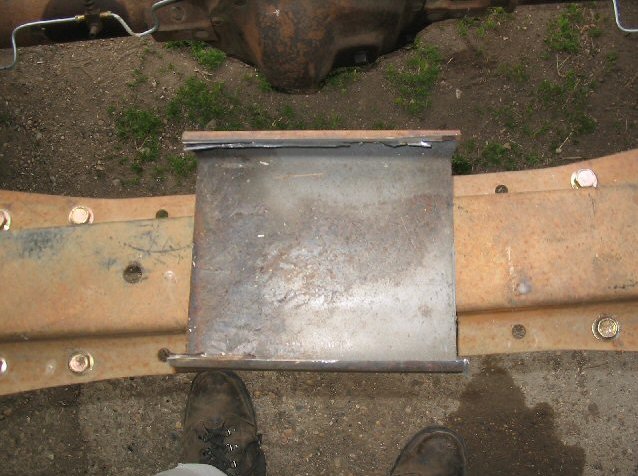
| This is the only crossmember I put back in that I had
previously removed. I felt that the frame needed something as it seemed a
little bare and this was very easy to narrow. I welded the 2" chunk of the 3"
C channel I had cut off the radiator crossmember in the middle. To make the C
channel to fit, I had to round the edges to make it fit inside the crossmember.
I then welded it with it clamped in the bench vise to get maximum penetration
as this crossmember may take some stress if the truck is loaded.
|
|
|
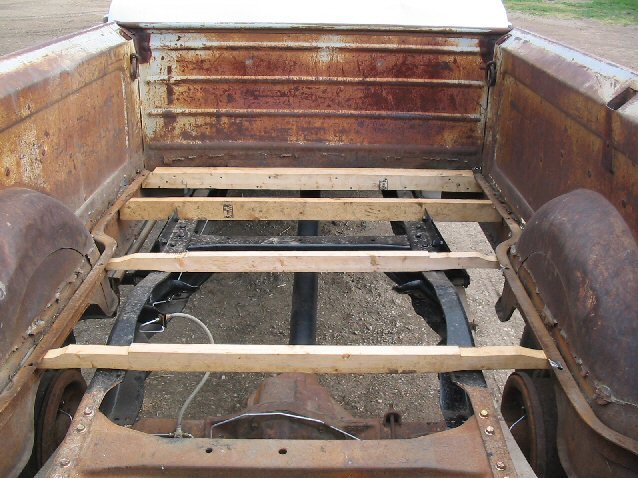
| I think this is the optimal placement of the bed floor crossmembers.
|
|
|
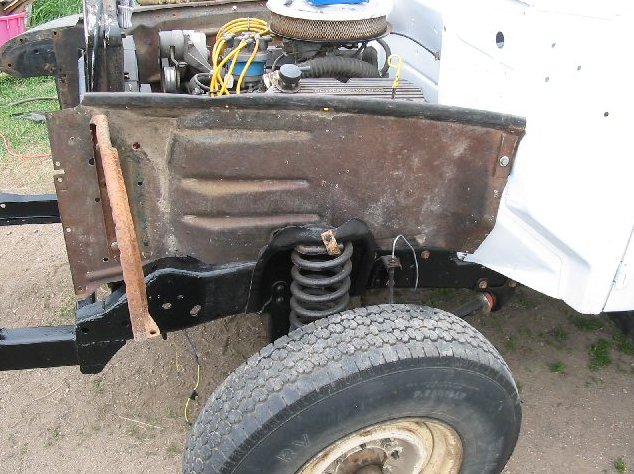
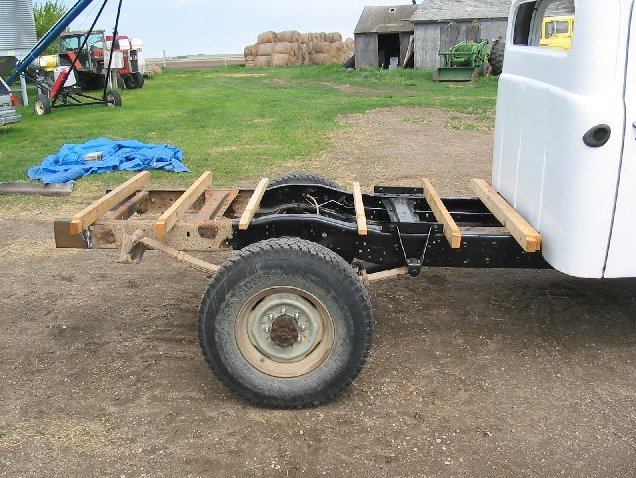
| Here I have put the box onto the truck. The frame after the
rear axle sits higher so you will have to do some modifications to the bed
crossmembers to make the bed sit right. You can see that the front spring
mounts will not interfere with the bed floor.
|
|
|
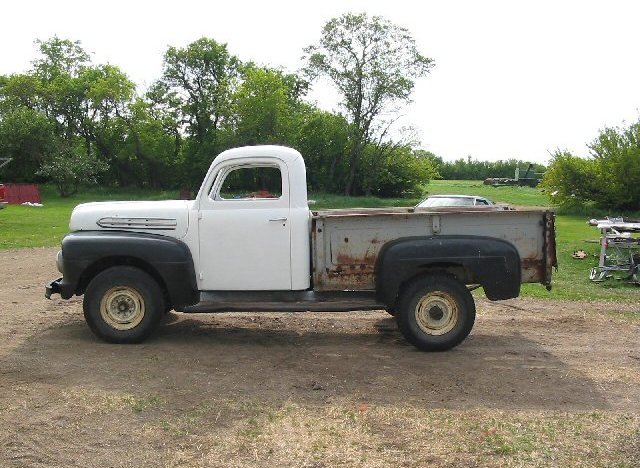
| Now you should have a pretty much complete truck again.
My truck is sitting about stock height and to the casual observer the truck
doesn't look like any modifications have been done. As you can see I still
have to play with my bed crossmembers to get the back of the box to sit a
little lower.
|
|
|
|
|